Loops (MacOS)
Loops contain the audio for a Cue. A Cue can contain as many Loops as your system can handle.
Adding Loops
Your show will always contain at least one Loop, which will be inside a Cue.
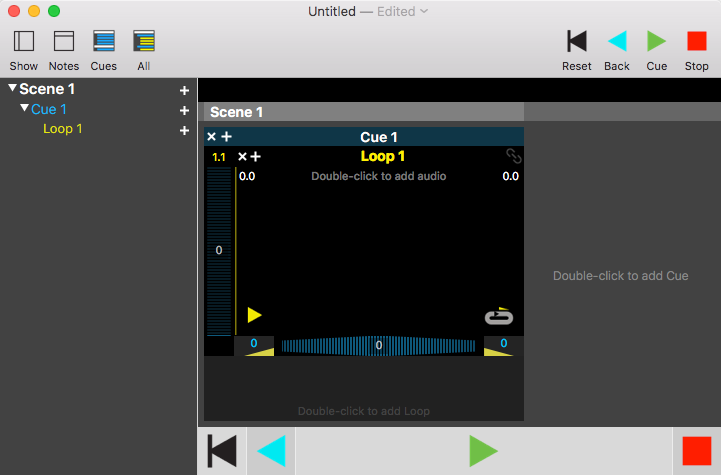
To add a Loop simply click on the '+' to the right of a Loop name in the Navigator. This adds the new Loop to the same Cue. If you need a Loop in a new Cue Add a Cue instead. When you first add a Loop it starts off containing Silence, but you can easily change this.

TIP: You can also add a Loop to a Cue by double-clicking anywhere in the background of the Cue.
If you want a new Loop at the top of a Cue, create one below the first Loop and then move it up to top. See Moving Loops.
Adding/Changing Audio
New Loops contain Silence. To add audio double-click on the empty, black image box. This will open the file open dialog. Navigate to the audio file and click Open to load that audio into the Loop.
The app attempts to create a sensible name for the Loop if you add audio to a silent Loop. If you change the audio for a Loop which already contained audio the name will not change; you will need to change it yourself. See Renaming Loops
IMPORTANT: TheatreSound does not copy audio files, it just stores a reference to them, so if you move or rename the audio files your show will no longer be able to find them.
Preview the Loop
Once the audio is imported, the waveform image appears in the Loop window. You can then adjust the playback volume using the slider on the left. Adjust the pan of the audio using the slider along the bottom. You can also set the fade-in and -out times by entering non-zero values in the boxes either side of the pan slider.
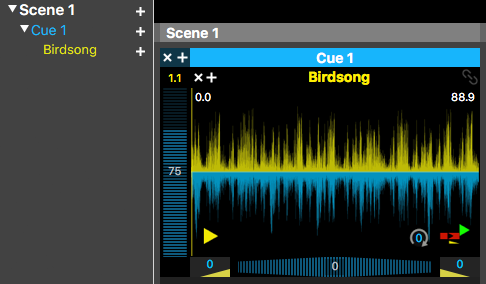
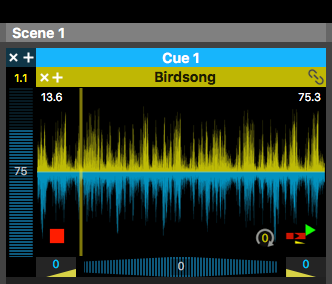
TIP: Preview the audio by clicking on the yellow preview button near the bottom-left corner of the Loop window. The cursor bar shows the progress of the playback while it is playing. Press the red stop button to stop the playback. If the Loop has fades these will be implemented, fading in from the first click and fading out from the second click, or as auto-cued. During a long fade-out you can force the audio to end by clicking again.
Loop Types
The Loop Type dictates how the audio will play once it has been cued. There are two basic types:
- LOOP - the audio will loop indefinitely until it is manually cued.
- PLAY - the audio will play a fixed number of times (usually once), and it will then either automatically cue the next Cue or just stop.
The Loop Type is set by clicking the type button in the Loop Window. The type will toggle through the various options:
- LOOP - cue immediately:
the audio keeps looping indefinitely until the show is manually cued, at which point the next Cue will start. If a fade-out has been set it will begin when the show is cued. - LOOP - cue at end:
the audio keeps looping indefinitely until the show is manually cued, however the next Cue will only start when the Loop reaches the end of the audio. If a fade-out has been set it will only begin when the next Cue starts. - PLAY - then end and wait:
the audio will play a fixed number of times (usually once), and it will then just stop and wait for a manual or automatic cue. - PLAY - and autocue as soon as it finishes:
the audio will play a fixed number of times (usually once), and it will automatically start the next Cue. If there is a fade out set, the fade will end just as the audio finishes and the next Cue starts. - PLAY - and autocue as soon as the fade-out begins:
the audio will play a fixed number of times (usually once), and it will automatically start the next Cue. If there is a fade out set, the next Cue will start to coincide with the beginning of the fade.
TIP: PLAY type Loops can loop, but only a fixed number of times. Set the number of repeats by editing the number inside the loop repeats indictor ![]() .
.
Moving Loops
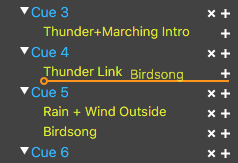
Use the Navigator to reorder/reassign your Loops. Click and hold the name of the Loop and drag it to the new position or different Cue. If the Loop you are moving is the only one in the Cue a silent Loop will be inserted in its place, so the Cue is not empty. The old Cue can be deleted if it is no longer needed.
Renaming Loops
To rename a Loop click on its name at the top of the Loop Window. This will activate an editing field. Type in the new name and hit 'Return/Enter' to commit the change.

Deleting Loops
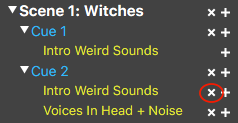
To remove a Loop simply click on the 'x' next to its name in the Navigator.
